Heat & Glo Remote Control Instructions: A Comprehensive Guide
This guide details operation of your Heat & Glo fireplace remote, covering pairing, troubleshooting, and advanced features like ESPHome integration and Qu-Drive access․
Understanding Your Heat & Glo System
Your Heat & Glo fireplace represents a sophisticated heating solution, offering both warmth and ambiance controlled through a dedicated remote system․ These systems are designed for convenience, allowing adjustments to flame height and heat output from a distance․ The core functionality relies on a wireless connection, primarily utilizing 2․4GHz technology for communication between the remote transmitter and the receiver unit installed within your fireplace․
Modern Heat & Glo fireplaces often incorporate advanced features like DMX input/output capabilities, enabling integration with broader home automation systems․ Some models also support integration with platforms like ESPHome, allowing users to emulate the remote control functionality using readily available hardware, such as a 433Mhz transmitter connected to an ESP module․ This opens possibilities for custom control schemes and integration with smart home ecosystems․
Understanding that your system can be operated both manually – via switches controlling heat settings – and remotely is crucial․ The remote itself is paired with a receiver, which then interfaces with the fireplace’s valve, dictating flame and heat levels․ Familiarizing yourself with these components and their interactions will greatly enhance your experience․
Components Included in the Remote Control Kit
Upon receiving your Heat & Glo remote control kit, carefully verify the contents to ensure all necessary components are present․ A standard kit typically includes a handheld remote control unit, the receiver system designed for installation beneath your fireplace, and the wiring required to connect the receiver to the fireplace valve․ This wiring is often color-coded for simplified installation, aligning with industry best practices․
Furthermore, the kit provides mounting solutions for both the remote control and the transmitter, usually in the form of wall holsters․ These allow for convenient placement and accessibility․ All necessary batteries for immediate operation of the remote are also included, eliminating the need for a separate purchase․
A comprehensive instruction manual is a vital part of the kit, detailing the installation process, pairing instructions, and troubleshooting tips․ Importantly, Heat & Glo provides access to a dedicated help line – 1-888 – staffed by Skytech professionals, offering live assistance should you encounter any difficulties during setup or operation․
Receiver System Installation
The receiver system, the core of remote functionality, is typically installed discreetly under your Heat & Glo fireplace․ Prior to installation, ensure the fireplace is completely powered off at the breaker to prevent electrical hazards․ Locate a suitable, accessible space near the fireplace valve, keeping it protected from direct heat and potential moisture․
Mount the receiver securely using appropriate hardware – screws are generally provided․ Connect the wiring harness from the receiver to the corresponding terminals on the fireplace valve, carefully following the color-coded guide detailed in the instruction manual․ Incorrect wiring can damage the system, so double-check all connections․
Once wired, connect the receiver to a power source․ It’s crucial to verify the voltage requirements match your home’s electrical system․ After powering on, the receiver will enter pairing mode, indicated by a flashing LED․ Refer to the pairing instructions to synchronize the receiver with your remote control․ Proper installation is vital for reliable operation and safety․
Wiring Connections: Color-Coded Guide
Establishing correct wiring connections between the receiver system and your Heat & Glo fireplace valve is paramount for safe and functional operation․ Always disconnect power at the breaker before commencing any wiring work․ The wiring harness utilizes a color-coded system to simplify the process․
Typically, the Red wire connects to the positive (+) terminal on the valve, providing power․ The Black wire serves as the neutral (-) connection․ White wires are often associated with signal transmission, controlling functions like flame height or on/off status․ Green or Bare Copper wires are dedicated to grounding, ensuring electrical safety․
Carefully match these colors to the corresponding terminals on both the receiver and the valve․ Securely fasten each wire using appropriate connectors, ensuring a tight and reliable connection․ Double-check all connections before restoring power․ Incorrect wiring can lead to system malfunction or damage․ If unsure, consult a qualified technician․
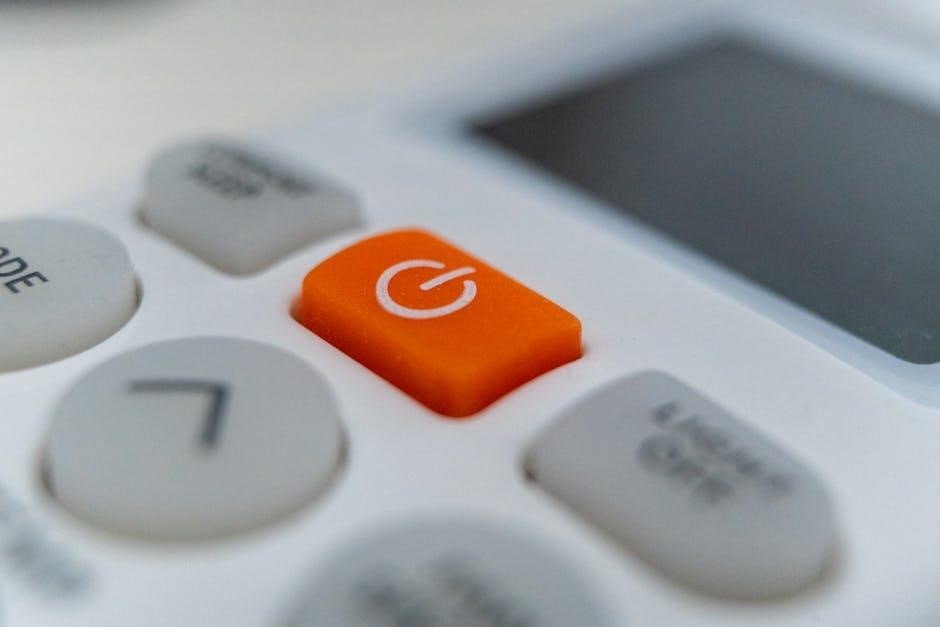
Remote Control Overview: Button Functions
Your Heat & Glo remote control offers intuitive operation of your fireplace system․ The primary Power button initiates and terminates fireplace operation․ Heat Setting buttons (typically three options – Low, Medium, High) adjust the heat output․ A dedicated Flame Height Control allows precise adjustment of flame appearance, offering customizable ambiance․
Additional buttons may include a Fan Control, regulating airflow for optimal heat distribution․ Some models feature a Timer function for automated operation․ The Mode button might cycle through different operating modes, such as ‘Auto’ or ‘Manual’․ Understanding each button’s function is key to maximizing your fireplace experience․
Refer to the included instruction manual for a detailed diagram illustrating each button’s location and corresponding action․ Familiarize yourself with the layout before initial use․ Proper button usage ensures safe and efficient operation of your Heat & Glo fireplace․ Experiment with the settings to discover your preferred comfort levels․
Initial Remote Control Pairing Process
Establishing a connection between your Heat & Glo remote and receiver is crucial for operation; Begin by ensuring the receiver is properly installed and powered on, typically located beneath the fireplace․ Insert fresh batteries into the remote control․ Most systems initiate pairing automatically upon power-up, but some require a manual process․
Locate the Pair or Sync button on the receiver – consult your manual for its exact location․ Press and hold this button until the receiver’s indicator light begins to flash․ Simultaneously, press and hold the Power button on the remote for several seconds․ A successful pairing is indicated by a solid indicator light on the receiver and confirmation from the remote․
If pairing fails, try again, ensuring no other 2․4GHz devices interfere․ If issues persist, consider resetting both the remote and receiver (refer to dedicated sections)․ A stable connection is vital for reliable control․ Following these steps ensures seamless integration and optimal performance of your Heat & Glo fireplace system․
Troubleshooting Pairing Issues
Difficulty pairing your Heat & Glo remote? Several factors can interfere with the 2․4GHz wireless connection․ First, verify fresh batteries are installed in both the remote and the receiver unit․ Ensure no other 2․4GHz devices (routers, microwaves) are operating nearby, as they can cause signal disruption․ Try moving the receiver closer to the fireplace for initial pairing․
If pairing continues to fail, attempt a reset of both the remote and receiver․ Removing the batteries overnight, as some users have reported, can sometimes resolve stubborn issues․ Switching to an older, grey remote module, if available, may also facilitate pairing, as newer models can occasionally present compatibility challenges․
Double-check the receiver’s indicator light sequence – a flashing light usually signifies pairing mode․ If the light doesn’t flash, the receiver may not be entering pairing mode correctly․ Consult the manual for specific light patterns․ If problems persist, contact Heat & Glo support or Skytech for assistance․
Replacing Batteries in the Remote
Maintaining fresh batteries is crucial for reliable remote operation․ Your Heat & Glo remote control kit includes all necessary batteries for initial use, but replacements will be needed periodically․ The remote typically requires standard alkaline batteries – check the battery compartment for the correct size and quantity, usually AAA or AA․
To replace the batteries, locate the battery compartment, usually on the back or underside of the remote․ Gently slide or pop open the compartment cover․ Remove the old batteries, noting the correct polarity (+ and -) indicated inside the compartment․ Insert the new batteries, ensuring proper alignment․
Securely close the battery compartment cover․ After replacing the batteries, you may need to re-sync the remote with the receiver unit, especially if the remote was without power for an extended period․ Refer to the “Syncing the Remote After Battery Replacement” section for detailed instructions․ A low battery indicator will alert you when replacement is needed․
Low Battery Indicator & Replacement
Your Heat & Glo remote control is equipped with a low battery indicator to alert you when power is dwindling․ This indicator typically manifests as a flashing light or a message displayed on the remote’s screen․ Don’t ignore this warning! Reduced battery power can lead to intermittent operation or complete failure to control your fireplace․
When the low battery indicator activates, promptly replace the batteries․ As detailed in the “Replacing Batteries in the Remote” section, locate the battery compartment and carefully remove the old batteries, observing correct polarity․ Insert fresh, high-quality alkaline batteries of the specified type (usually AAA or AA)․
After battery replacement, it’s often necessary to re-sync the remote with the receiver unit․ This ensures the remote and fireplace communicate effectively․ A failed sync can occur if the remote is left without power for too long․ Refer to the “Syncing the Remote After Battery Replacement” section for detailed instructions on restoring the connection․ Proactive battery replacement prevents frustrating interruptions․
Manual Override Operation
Even with a fully functional remote control system, your Heat & Glo fireplace is designed with manual override capabilities for situations where the remote is unavailable or malfunctioning․ This ensures you can still enjoy the warmth and ambiance of your fireplace․
Typically, manual controls are located directly on the fireplace unit itself, often behind a small access panel or near the gas valve․ These controls usually consist of three switches, offering a choice of heat settings: Off, Low, and High․ A separate switch controls the flame height, allowing for visual adjustment․
To operate manually, simply toggle the switches to your desired settings․ Remember that manual operation bypasses the remote control’s programmed features, such as timers or specific temperature settings․ The product can be controlled both manually and by remote control․ Always ensure the fireplace is turned off before attempting any manual adjustments․ If issues persist, consult the full instruction manual or contact Heat & Glo support․
Heat Setting Adjustments
Your Heat & Glo remote control allows for precise adjustments to the heat output of your fireplace, providing customized comfort levels․ Typically, the remote features dedicated buttons or a menu system to control these settings․ These settings usually include options for ‘Off’, ‘Low’, ‘Medium’, and ‘High’ heat output․
When adjusting heat settings via the remote, the receiver system communicates with the fireplace’s gas valve to regulate the flame size and BTU output․ Observe the flame characteristics to confirm the desired heat level is achieved․ Some models may display the selected heat setting on the remote’s screen or on the fireplace itself․
Remember that higher heat settings consume more gas․ Manual controls also provide heat setting adjustments, offering a backup if the remote is unavailable․ Always refer to your specific model’s instruction manual for detailed guidance on heat setting adjustments and safety precautions․ Proper heat management ensures efficient operation and optimal comfort․
Flame Height Control
The Heat & Glo remote control often incorporates functionality to adjust the flame height, allowing for visual customization and nuanced heat control․ This feature doesn’t necessarily alter the BTU output significantly, but primarily affects the aesthetic appearance of the fireplace․ Typically, dedicated buttons on the remote, often marked with flame icons, control this function․
Adjusting the flame height communicates a signal to the receiver, which then modulates the gas valve to change the flame’s size․ Observe the flame carefully after each adjustment to achieve the desired visual effect․ Lower flame heights create a more subdued ambiance, while higher flames offer a more dramatic display․
It’s important to note that excessively high flame settings, while visually appealing, may not necessarily translate to increased heat output; Always prioritize safety and adhere to the manufacturer’s recommendations regarding flame height․ Refer to your specific model’s manual for detailed instructions and safety guidelines related to flame height control․
Remote Control Range & Obstructions
The operational range of your Heat & Glo remote control, utilizing a 2․4GHz wireless connection, is typically around 30-50 feet in open air․ However, this range can be significantly reduced by physical obstructions and interference from other wireless devices․ Walls, furniture, and even large metal objects can impede the signal․
Common household materials like concrete, brick, and plaster are particularly effective at blocking the 2․4GHz signal․ Electronic devices operating on the same frequency, such as Wi-Fi routers, microwaves, and Bluetooth devices, can also cause interference, leading to unreliable performance or complete signal loss․
To maximize range and reliability, ensure a clear line of sight between the remote and the receiver unit․ Minimize obstructions and keep the receiver away from potential sources of interference․ If experiencing connectivity issues, try repositioning the receiver or reducing the number of nearby wireless devices․
Understanding the 2․4GHz Wireless Connection
Your Heat & Glo remote control communicates with the fireplace system using a 2․4GHz wireless connection, a common frequency band for many wireless technologies like Wi-Fi and Bluetooth․ This technology allows for reliable, long-range control without the need for direct wiring between the remote and the receiver unit․
The 2․4GHz frequency offers a good balance between range and data transmission speed, making it suitable for controlling fireplace functions like flame height, heat settings, and on/off operation․ However, it’s important to understand that this frequency band can be susceptible to interference from other devices operating nearby․

Factors like physical obstructions (walls, furniture) and the presence of other 2․4GHz devices can impact the signal strength and reliability․ The pairing process establishes a unique communication link between your specific remote and receiver, minimizing the chance of accidental control by neighboring devices․ Maintaining a clear signal path is crucial for optimal performance․
DMX Input/Output Capabilities
Certain Heat & Glo fireplace systems feature DMX (Digital Multiplex) input/output capabilities, expanding control options beyond the standard remote․ DMX is a communication protocol widely used in professional lighting and entertainment industries, allowing for sophisticated control of multiple devices from a central controller․
The DMX interface on your Heat & Glo system enables integration with home automation systems or custom control panels․ This allows you to incorporate the fireplace into broader scenes and routines, controlling it alongside lighting, audio, and other smart home devices․ A DMX controller sends signals to the fireplace receiver, dictating flame height, heat output, and other functions․
The output port allows for “daisy-chaining” multiple DMX-compatible devices, simplifying wiring and control․ While requiring some technical expertise to set up, DMX offers a powerful and flexible solution for advanced fireplace control, exceeding the limitations of a standard remote․
ESPHome Integration for Remote Emulation
For users comfortable with DIY electronics and home automation, ESPHome provides a powerful method to emulate your Heat & Glo RF fireplace remote․ ESPHome is a system to control your ESP8266 or ESP32 based devices via simple configuration files and without coding․ This allows you to control your fireplace using a minimal hardware setup – typically just one pin on an ESP board connected to a 433MHz transmitter․
The primary challenge lies in deciphering the Heat & Glo remote’s signal codes and timings․ Fortunately, resources are available online detailing this process, enabling you to replicate the remote’s functionality within ESPHome․ Once configured, you can integrate the emulated remote into your existing home automation ecosystem, such as Home Assistant․
This approach offers benefits like remote control via the internet, voice control integration, and the ability to create complex automation routines․ It’s a cost-effective alternative to purchasing additional remote controls or relying solely on the original remote․
433Mhz Transmitter Setup
Utilizing a 433MHz transmitter is central to emulating your Heat & Glo remote, particularly when employing ESPHome or similar DIY automation platforms․ These transmitters are inexpensive and readily available online, offering a straightforward method for broadcasting the remote control signals․ The setup typically involves connecting the transmitter’s data pin to a GPIO pin on your ESP8266 or ESP32 development board․
Ensure proper wiring and voltage compatibility between the transmitter and the ESP board․ Most 433MHz transmitters operate on 3․3V or 5V, so verify your board’s output voltage․ Once physically connected, configuration within ESPHome (or your chosen platform) involves defining the transmitter component and specifying the GPIO pin used for data transmission․
Successful operation hinges on accurately replicating the Heat & Glo remote’s signal protocol, including frequency, modulation, and pulse timings․ Resources detailing these parameters are crucial for achieving reliable control․ Testing the setup involves sending pre-defined codes to verify signal transmission and receiver response․
Identifying Different Remote Modules (Grey vs․ Newer Models)
Heat & Glo has transitioned through different remote control module designs, notably a distinction between older “grey” modules and newer iterations․ Recognizing these differences is crucial for troubleshooting pairing issues and ensuring compatibility with emulation projects like ESPHome․ The grey modules, often found in older installations, appear visually distinct with their grey casing and may exhibit slightly different pairing behaviors․
Users have reported greater success with pairing the older grey modules, suggesting potential firmware or protocol variations in the newer models․ When encountering pairing difficulties, swapping to a known-working grey module can serve as a diagnostic step․ This helps isolate whether the issue lies with the remote itself or the receiver/module․
The newer modules generally feature a sleeker design and may incorporate updated wireless communication protocols․ Documentation and online resources may not always clearly delineate these differences, making visual identification and community forums valuable resources for determining your module type․
Resetting the Remote Control
Occasionally, the Heat & Glo remote control may require a reset to resolve pairing issues or erratic behavior․ While a dedicated reset button isn’t typically present, a common troubleshooting step involves a complete power cycle․ This entails removing all batteries from the remote control unit for an extended period – ideally overnight – to fully discharge any residual power․
After leaving the remote without batteries for several hours, reinsert fresh batteries and attempt the pairing process again․ This often clears any corrupted settings or temporary glitches that may be preventing successful synchronization with the receiver system․ It’s important to follow the official pairing instructions closely after the reset․
If a simple battery removal doesn’t resolve the issue, consult the full instruction manual for any model-specific reset procedures․ Some advanced models might have hidden reset combinations or require interaction with the receiver unit itself․ Remember to document any changes made during the reset process․
Syncing the Remote After Battery Replacement
Replacing the batteries in your Heat & Glo remote control can sometimes disrupt the established connection with the receiver system, necessitating a resynchronization process․ Don’t assume the remote will automatically reconnect; a deliberate syncing step is usually required․ Begin by ensuring the receiver is powered on and within range of the remote․
Refer to the instruction manual for the precise syncing procedure, as it can vary slightly between different Heat & Glo models․ Generally, this involves pressing and holding a specific button or combination of buttons on the remote for a designated period – often until a light on the receiver begins to flash․ This indicates the receiver is in pairing mode․
If you encounter difficulties, try the overnight battery removal trick mentioned in the resetting section before attempting to sync again․ Switching to an older, grey module can also help with resyncing; Patience is key; the syncing process may take a few attempts to complete successfully․
Advanced Settings & Qu-Drive Access (If Applicable)
For certain Heat & Glo models, particularly those with more sophisticated control systems, access to advanced settings is possible via the Qu-Drive interface․ This typically involves connecting a USB device to a port located on the fireplace’s control panel – often on the upper surface․ The Qu-Drive allows for deeper customization of fireplace operation beyond standard remote functions․
To access Qu-Drive, open the “Setup / Utility / Qu-Drive” screen on the fireplace’s interface․ The status window will display information about the connected USB device․ This interface may allow adjustments to flame characteristics, heat output profiles, or integration with smart home systems․
Consult your Heat & Glo model’s specific documentation for detailed instructions on navigating the Qu-Drive and understanding the available settings․ Improper adjustments could affect fireplace performance, so proceed with caution and refer to the manual․ Remember that not all Heat & Glo fireplaces feature Qu-Drive functionality․
Safety Precautions When Using the Remote
When operating your Heat & Glo fireplace with the remote control, prioritize safety․ Always ensure a clear line of sight between the remote and the receiver unit, avoiding obstructions that could interfere with the 2․4GHz wireless signal․ Never allow children to operate the remote unsupervised, as unintended adjustments to flame height or heat settings could pose a hazard;
Regularly inspect the remote and receiver for any signs of damage․ Do not use a damaged remote, as it could lead to unpredictable fireplace behavior․ Be mindful of the remote’s range; operation outside the specified range may result in unreliable control․
Avoid exposing the remote to extreme temperatures or moisture․ When performing maintenance on the fireplace, always turn off both the manual controls and disable the remote functionality to prevent accidental activation․ If you notice any unusual behavior, immediately discontinue remote use and consult the troubleshooting section of this guide or contact Heat & Glo support․
Contacting Heat & Glo Support & Skytech Help Line
If you encounter persistent issues with your Heat & Glo remote control, or require further assistance beyond this guide, several support avenues are available․ For direct support regarding your Heat & Glo fireplace system, please visit the official Heat & Glo website to access their comprehensive FAQ section, troubleshooting resources, and contact form․ Their website provides detailed information on product specifications and warranty details․
For immediate assistance with remote control functionality, particularly concerning pairing, signal issues, or component replacement, Skytech offers a dedicated help line․ You will receive assistance from Skytech via a free 1-888 Help Line for live support․ This service is included with your remote control kit․
When contacting support, have your fireplace model number and remote control module information readily available to expedite the process․ Be prepared to describe the issue in detail, including any troubleshooting steps you’ve already taken․